2015 MLF Complete
- Details
- Published: Wednesday, 23 December 2015 20:40
- Written by David DeCiero
I decided to do a quick MLF test a little earlier than usual since I had not used BM45 at all this year. I had instead used BDX and BM 4x4. The BDX never had any problems but the BM45 has a moderately high sulfur production which can inhibit MLF. Since the BM4x4 is a mix of BM45 and another, faster acting strain, I wanted to see if it would cause a difference in MLF.
I did the MLF test about 38 days after I inoculated. I do a paper chromotography test, utilizing the solvent, chromatography paper, the big jar, capillary tubes, and acid control samples. The first step is to draw lines with a pencil on the chromatography paper. The first is a horizontal line along the long edge of paper, that is 1” above the bottom. Then, I make an initial mark on that line 1” from the short edge. I then make marks every 1 ¼” inch from there. This allows me to get 7 marks on the paper, enough for the 3 controls and 4 samples. I also make marks ¼” from each mark on the paper, both before and after each mark to create guides so I can make each sample ½”. This simplifies the decision on how much sample to allow to be drawn out of the pipette and onto the paper. (It also ensures that no sample touches the solvent since that is also ½” high). I then write under each mark what sample it will contain. This includes the controls (Tartaric, Malic, Lactic) and the sample vessel #. I simply number each of the carboys to allow for traceability to the sample. The next step is to use the pipettes to take a sample of each and place it on the paper. These are capillary tubes, so you can just stick the tube into the vessel and it will draw it up. Then, I place the tube at an angle on the center sample mark and let the liquid be drawn out until it hits the guide marks for that sample. I repeat this process for all the samples that I have, utilizing a different tube each time to ensure no cross contamination. I then let the sample dry for 30 minutes. I let the paper hang over the edge of a table to ensure it dries well from both sides. I have found that letting it sit on a table doesn’t allow it to dry as well. Not sure if that makes a difference, though.
After the 30 minutes is up, I get the big jar and fill it ½” full with the chromatography solvent. I have a mark on the jar and just make sure to fill it to that level. Then, I staple the paper together so that the samples are all on the bottom edge, making sure not to overlap the paper. This can be a bit tricky to make sure the top and bottom are even and you don’t overlap. The staple creates a bridge between the two edges of the paper. I then put a plastic clip handle on the top of the paper (to ease removal) and slowly place it in the jar. I then wait 8 hours.
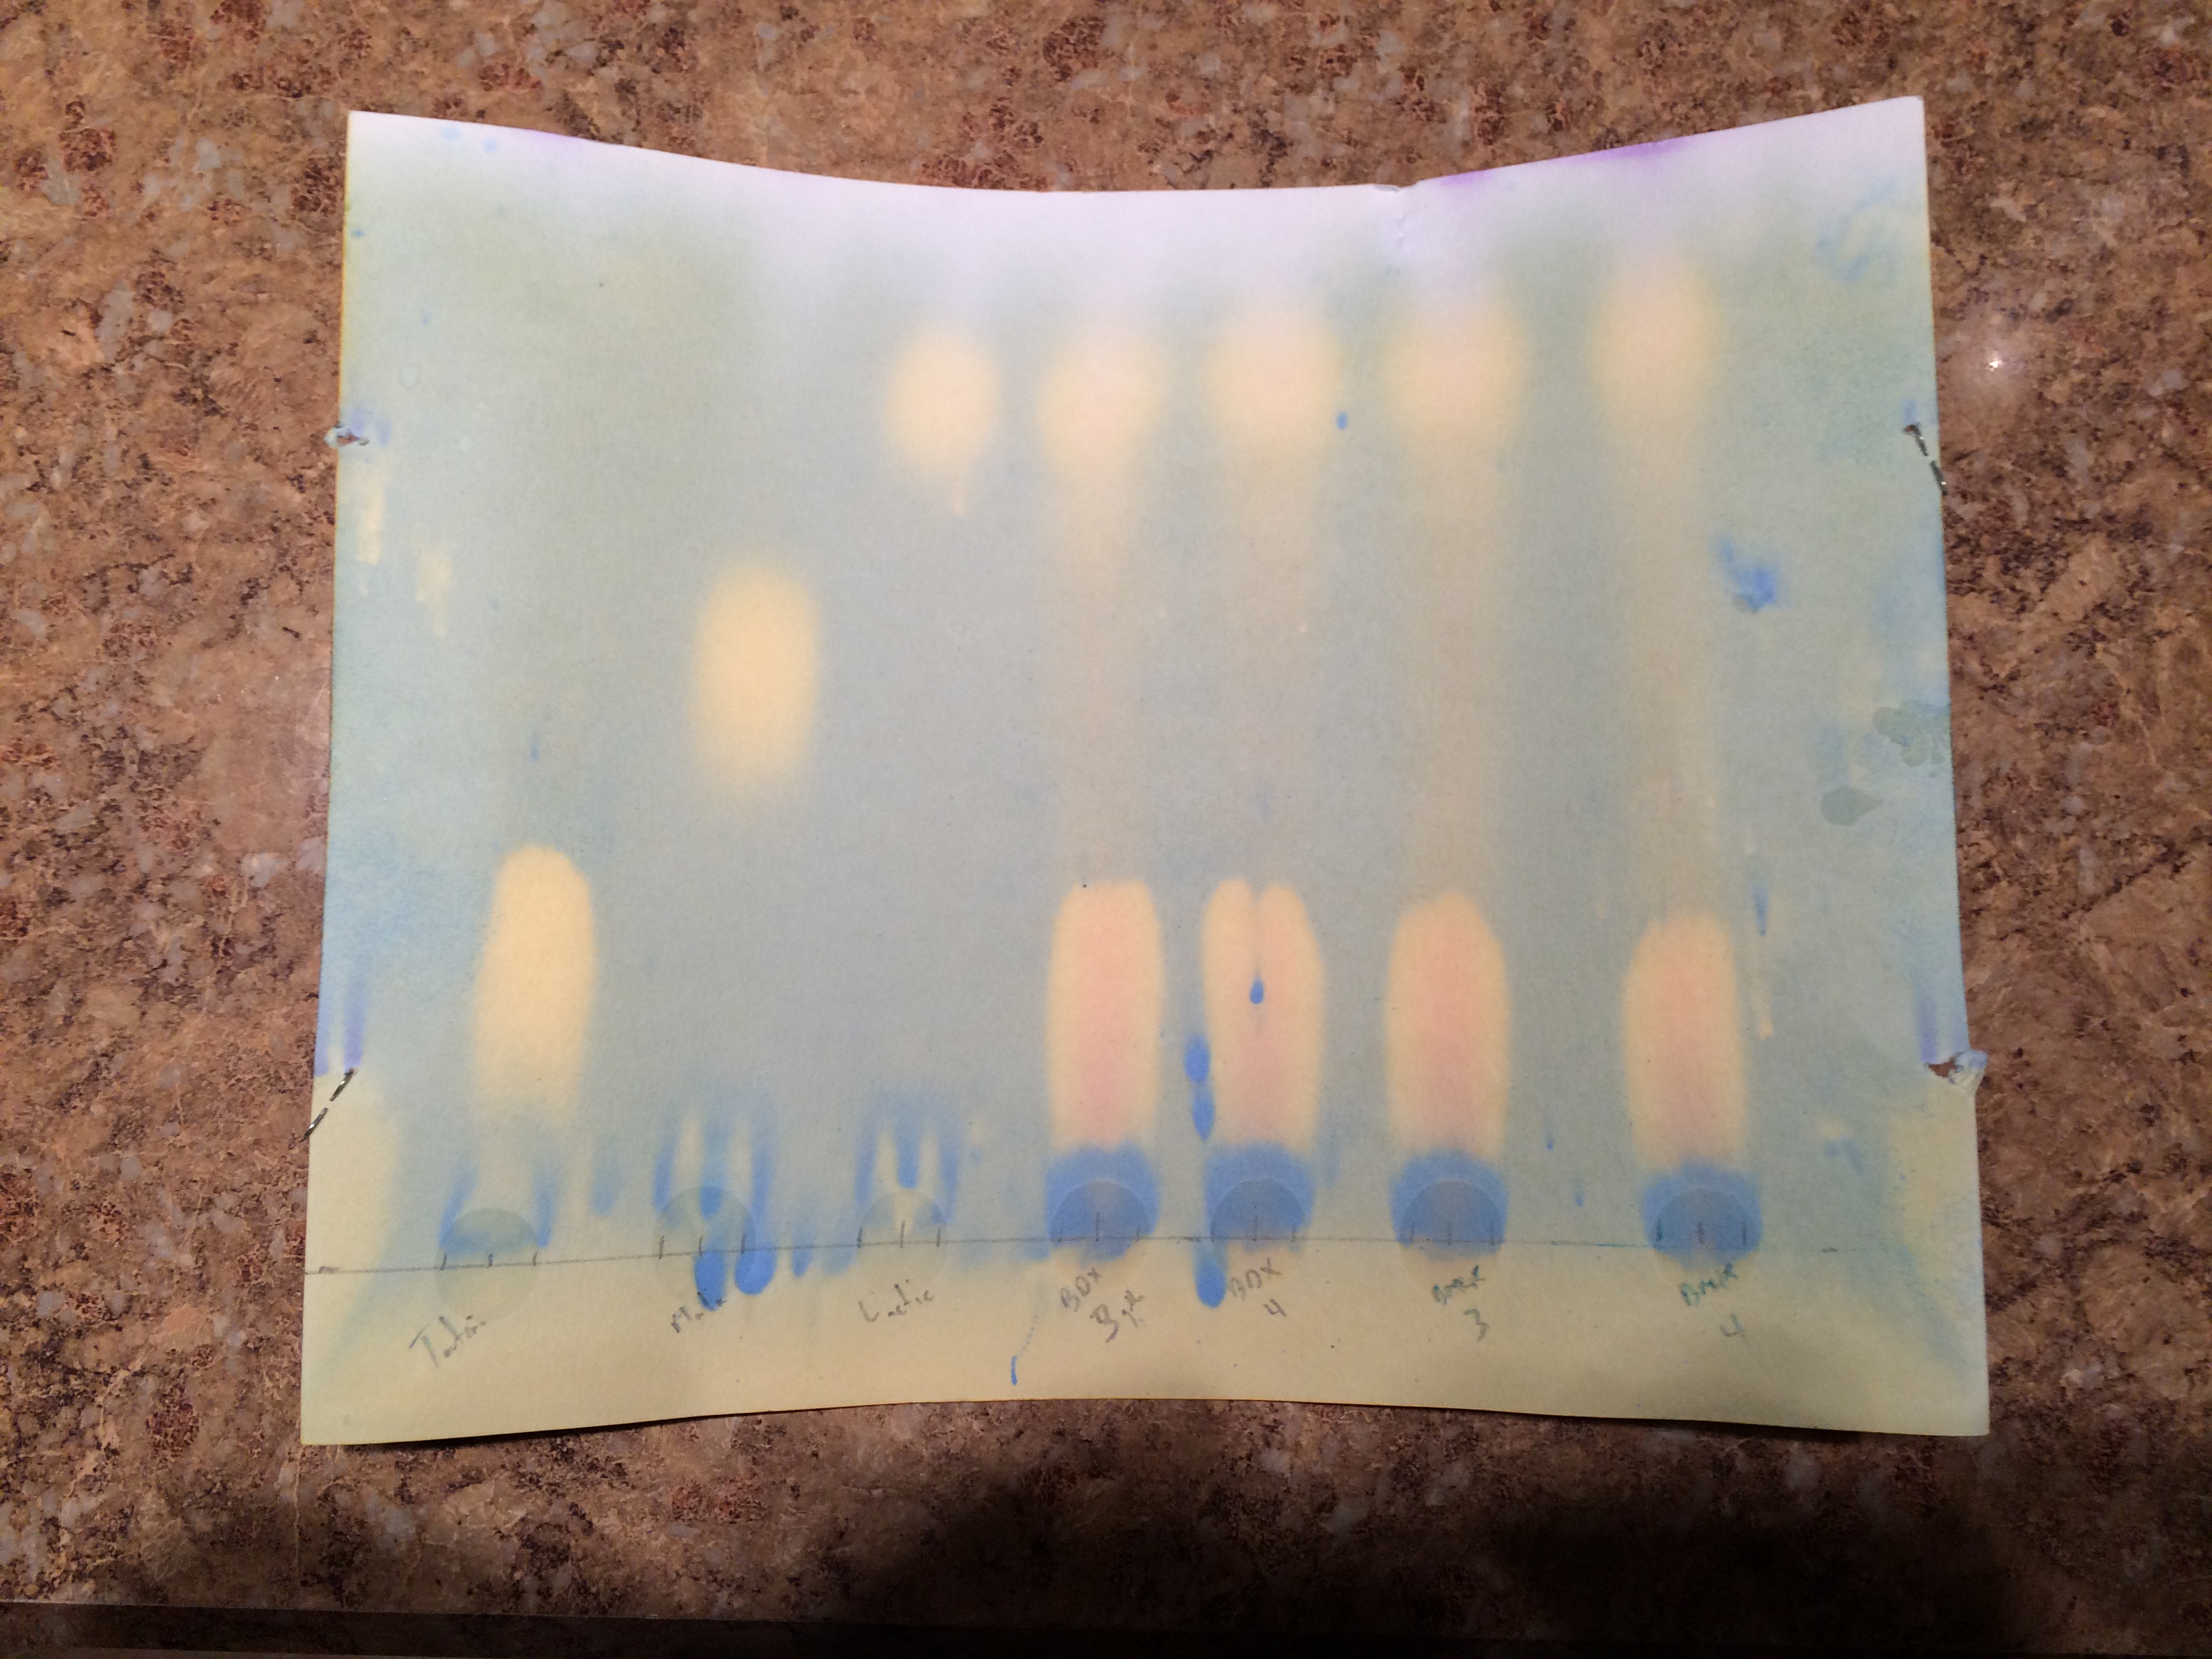
After 8 hours, the solvent has made it to the top of the jar and it should be removed. The solvent is pungent, so when I remove it, I always want it to dry in an airy place. I do this in my garage, otherwise a room in your house will stink for a couple days. I have found that if it is warm and dry outside, the resultant image on the paper is a lot better than if it is either cold or moist outside. Luckily, this year, it was warm and dry, so the test was extremely easy to read. I know some people utilize blow dryers to speed up the drying process, but I personally have not used one. At the end of the day, here is the chormotography paper:
It is easy to see that none of the wine samples have malic acid left. All of it has been converted to lactic acid. So, MLF was done a little earlier than I planned. This may be due to use of BM4x4 or some other factor. For next year, I’ll make sure to test a couple weeks earlier to ensure I am not unnecessarily putting the wine at risk by not sulfiting quickly enough. The completion of MLF allowed me to stop heating my fermentation chamber and turn off the brew belts. (Since my basement is unheated, it falls into the 50’s in the winter, requiring additional heat to ensure MLF). I mixed up a batch of 10% suflite solution and added 35 ppm to each of the carboys. In 1 month, I will test for free SO2 and then rack off the lees. My plan this year is to utilize Flextanks for the maturation of the wine to provide some microoxygenation. I’ll put it into these tanks after that first racking.